3.2. Configuration
3.2.1. Open the Portainer UI
The voraus.core is executed as a software stack inside Portainer. If you are connected to a voraus.ipc from voraus robotik, the Portainer web interface is accessible via the address https://192.168.1.1:9443. For all other kind of devices, check out the Addon specific documentation.
Note
The Portainer web interface is protected by a login. By default, these are the login credentials for the different accounts:
Administrator
User: admin
Password: voraus
Default User
User: voraus
Password: voraus
Warning
Please change the login data after receiving and commissioning the product in accordance with your internal security guidelines and ensure that only authorized persons are granted access to the system.
3.2.2. Access the voraus.core software stack
Once you logged in to the Portainer web interface, load the local or primary environment by clicking on the corresponding entry in the environments list. The name can vary for different host systems.
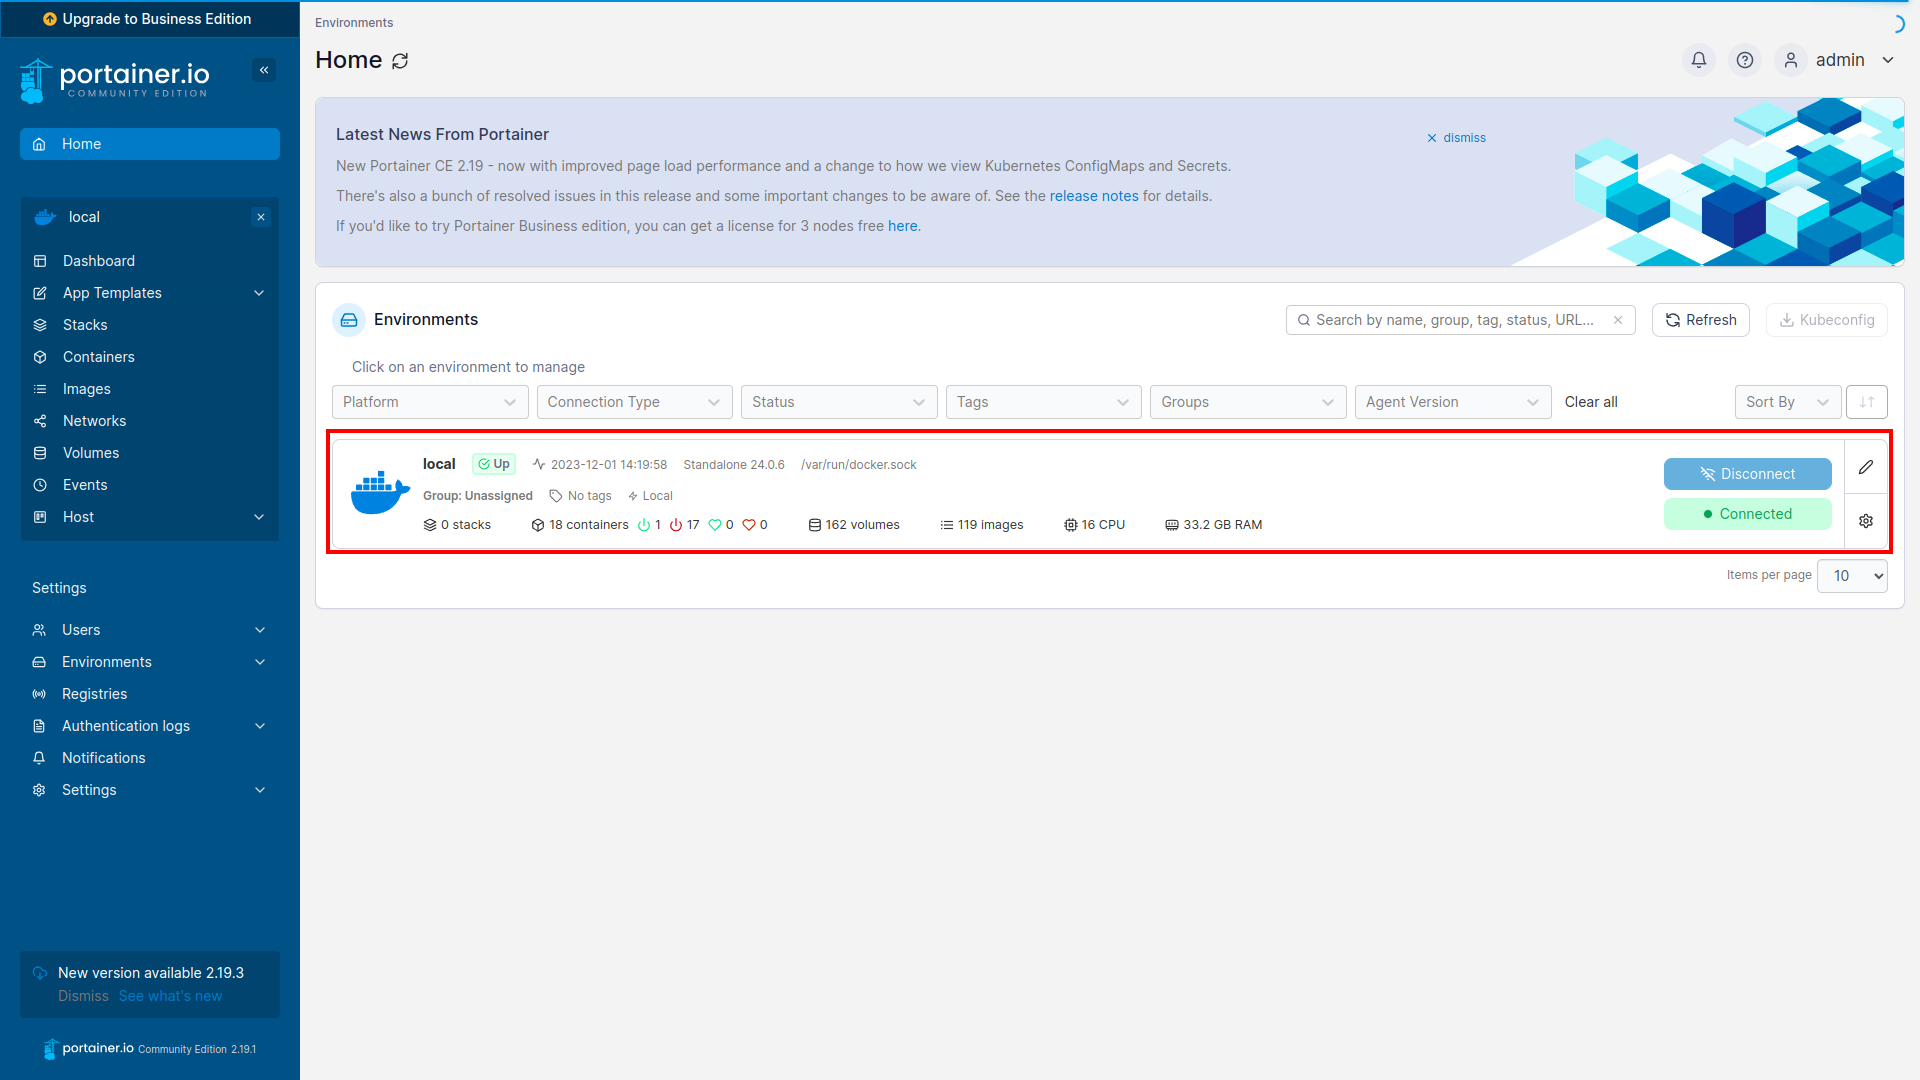
Fig. 4 Environment overview
In this environment you have access to all Stacks, Containers, Images, Networks and Volumes. Mainly you will only need to access the Stacks section.
Open the Stacks page (Fig. 5).
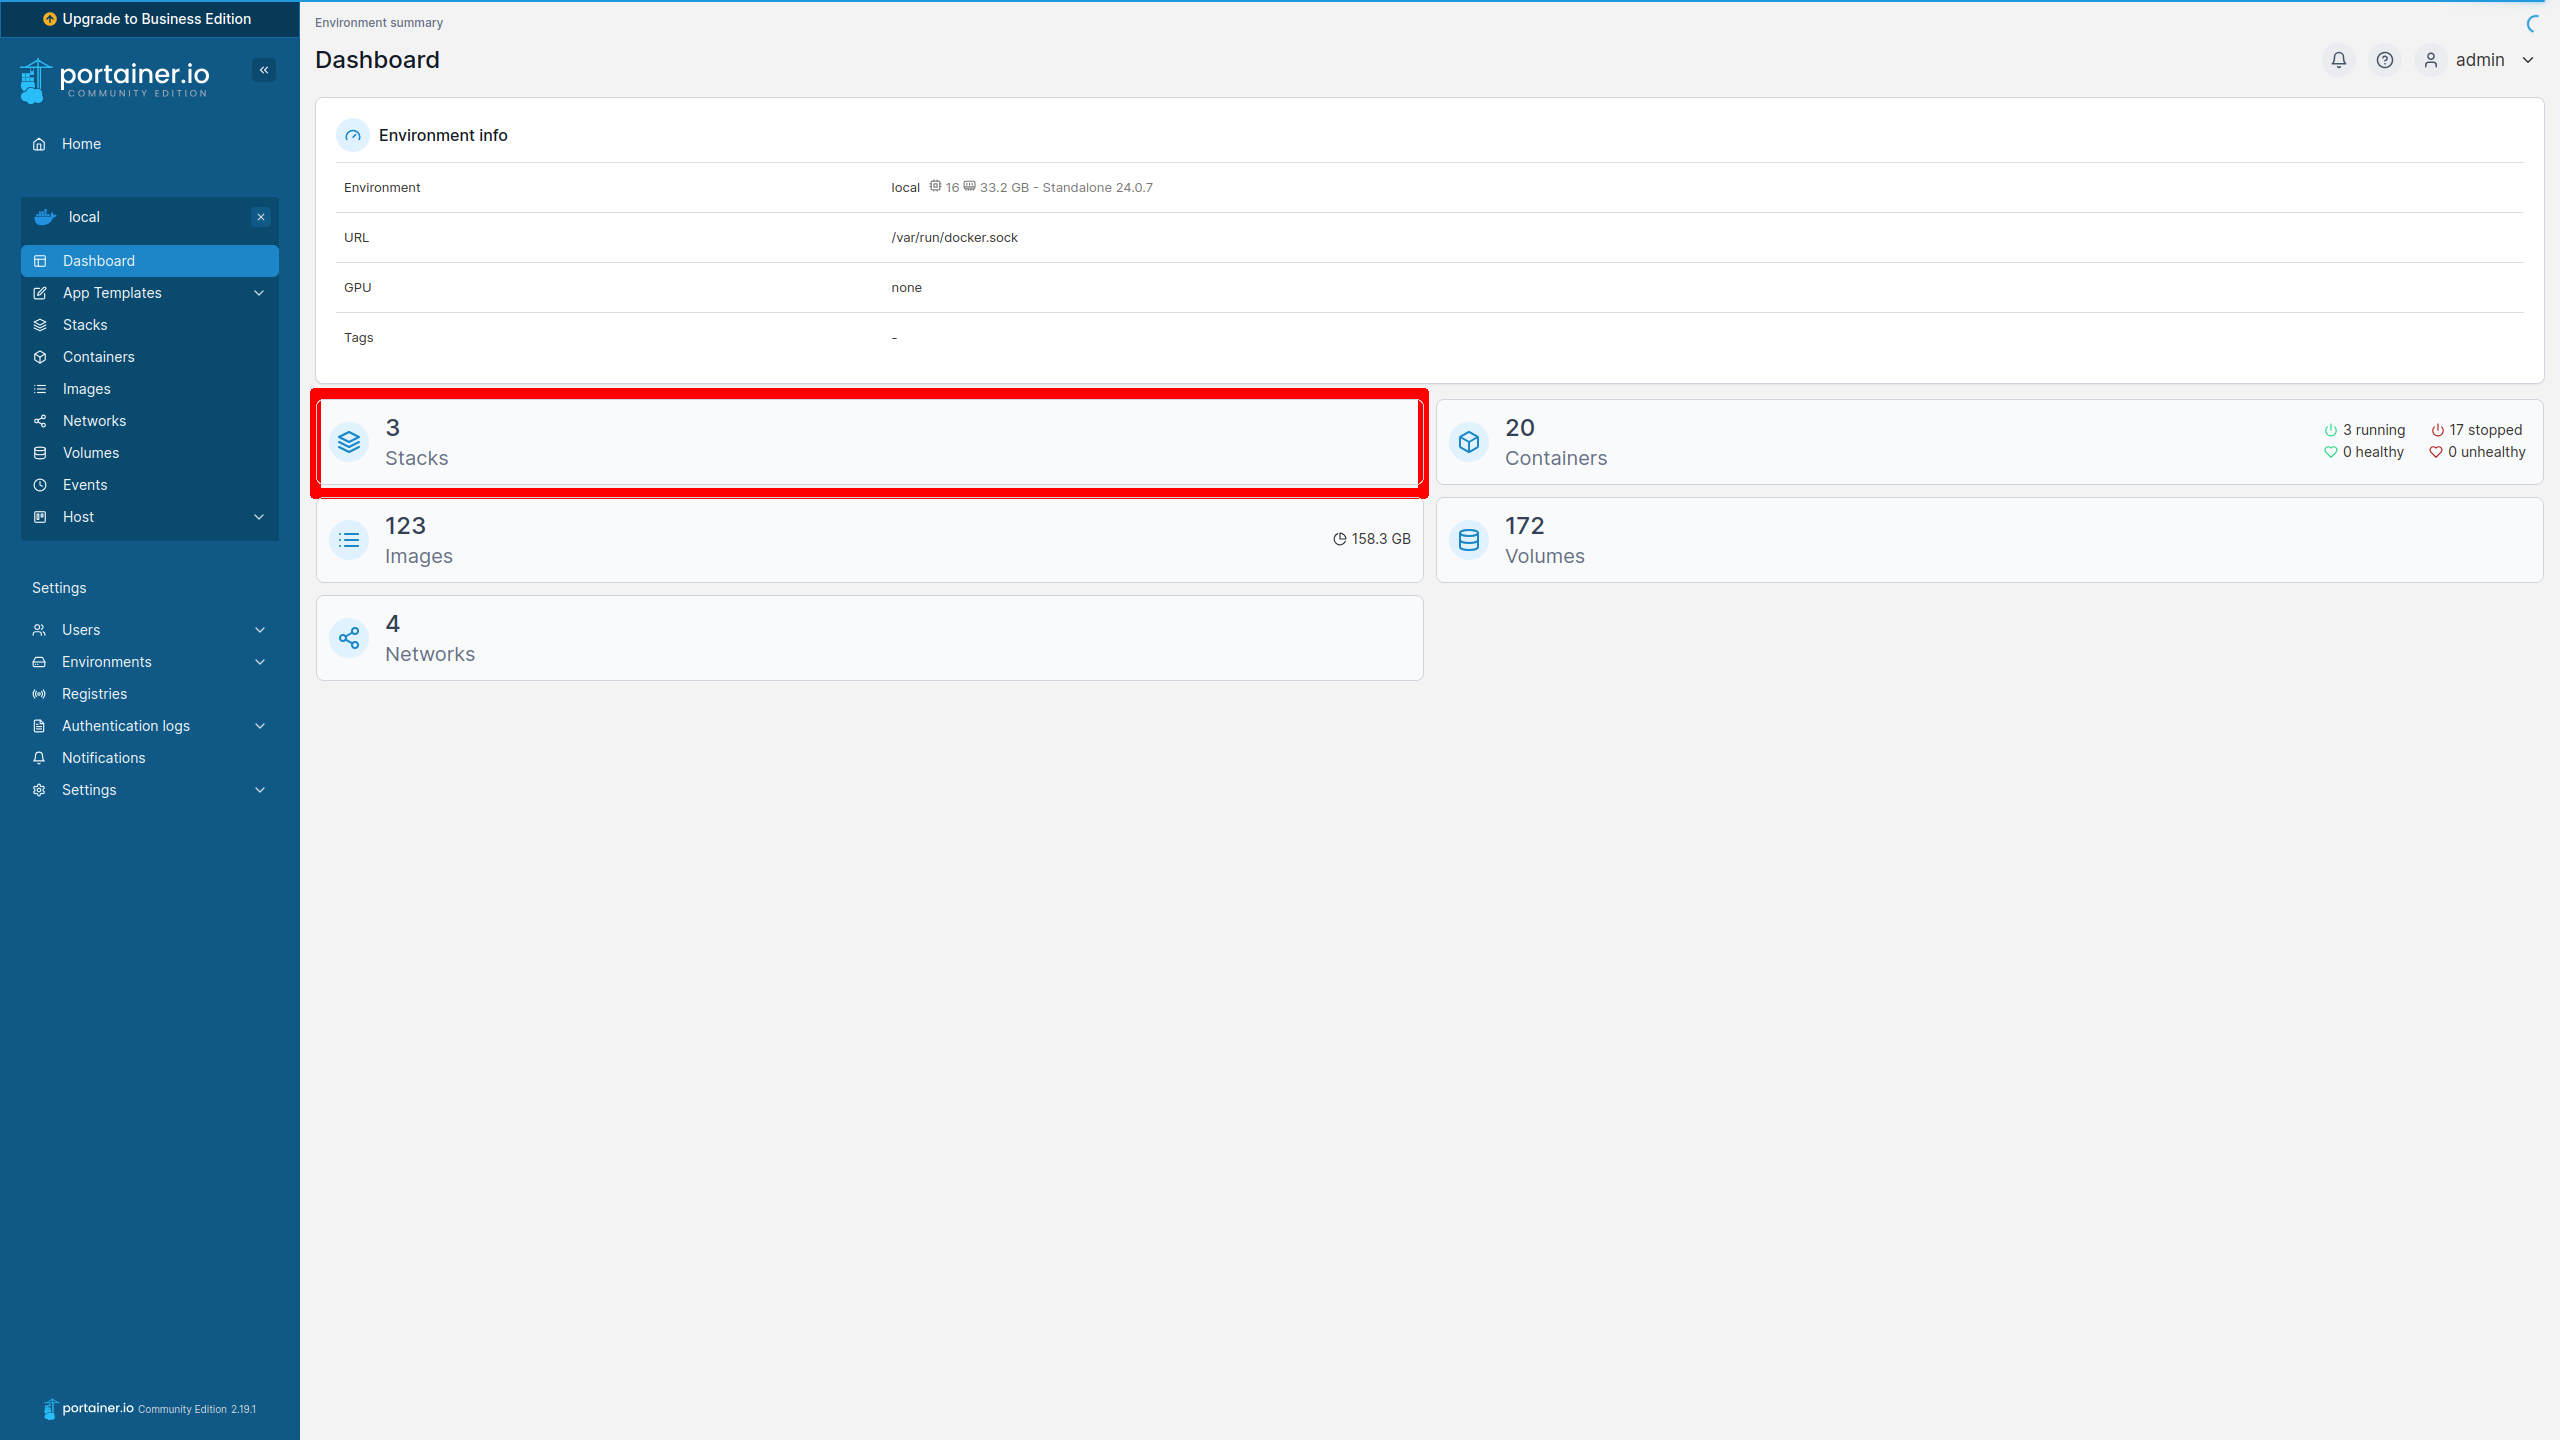
Fig. 5 Navigate to the stacks view
An overview of all existing stacks is displayed. If no stacks are listed or none of them is a voraus.core software stack, follow the instructions in Create a new stack.
Open the voraus.core stack, by clicking on it (Fig. 6).
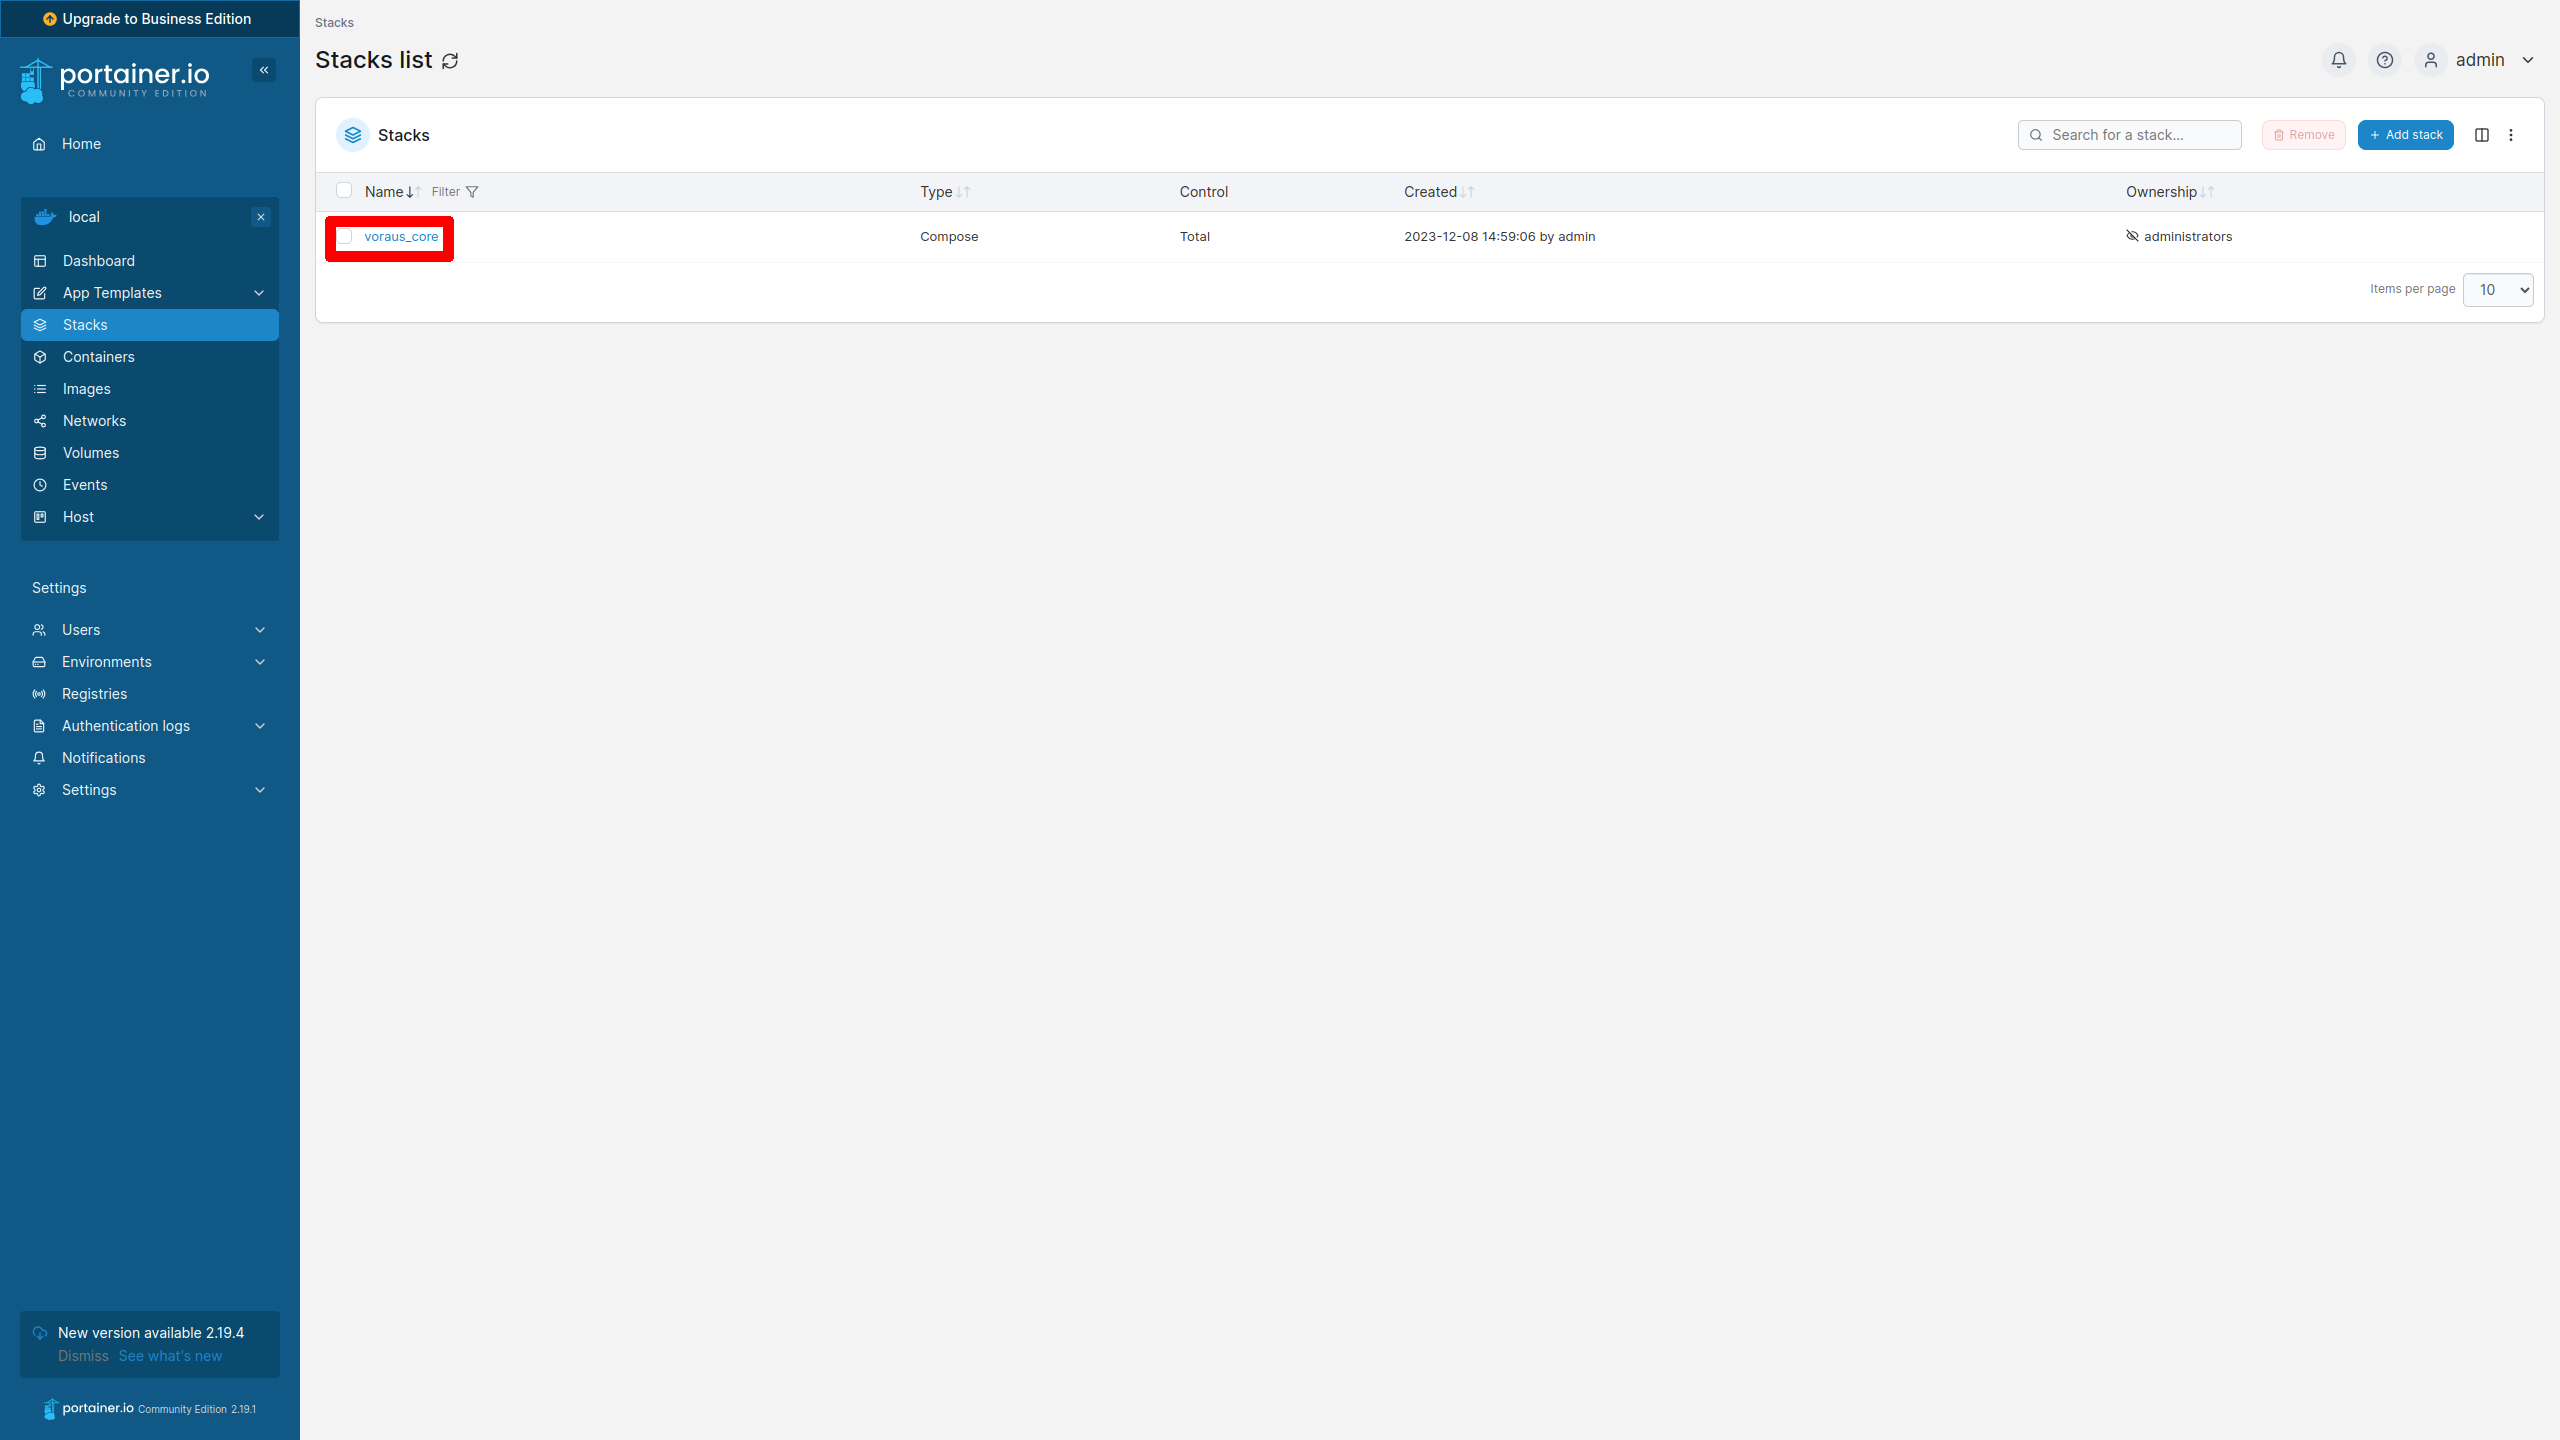
Fig. 6 Open the voraus.core stack.
The software stack can be started, stopped (Fig. 7/➊) or configured (Fig. 7/➋).

Fig. 7 The opened voraus.core stack.
Once the stack is running, the voraus.operator can be accessed by the browser via the IP address http://192.168.1.1 for UP² systems. For other devices check out the Addon specific documentation.
3.2.3. Create a new stack
Press the + Add stack button in order to create the voraus.core stack.
Define a stack name e.g. voraus_core.
- Configure Stack by
clicking on Upload and selecting the voraus.core****.yaml from the release artifact
clicking on Web editor and configuring the stack according to your needs (see compose file configuration of your voraus.core).
Press on Deploy the stack.
Verify that the stack has started. It is supposed to show the status running (Fig. 8).
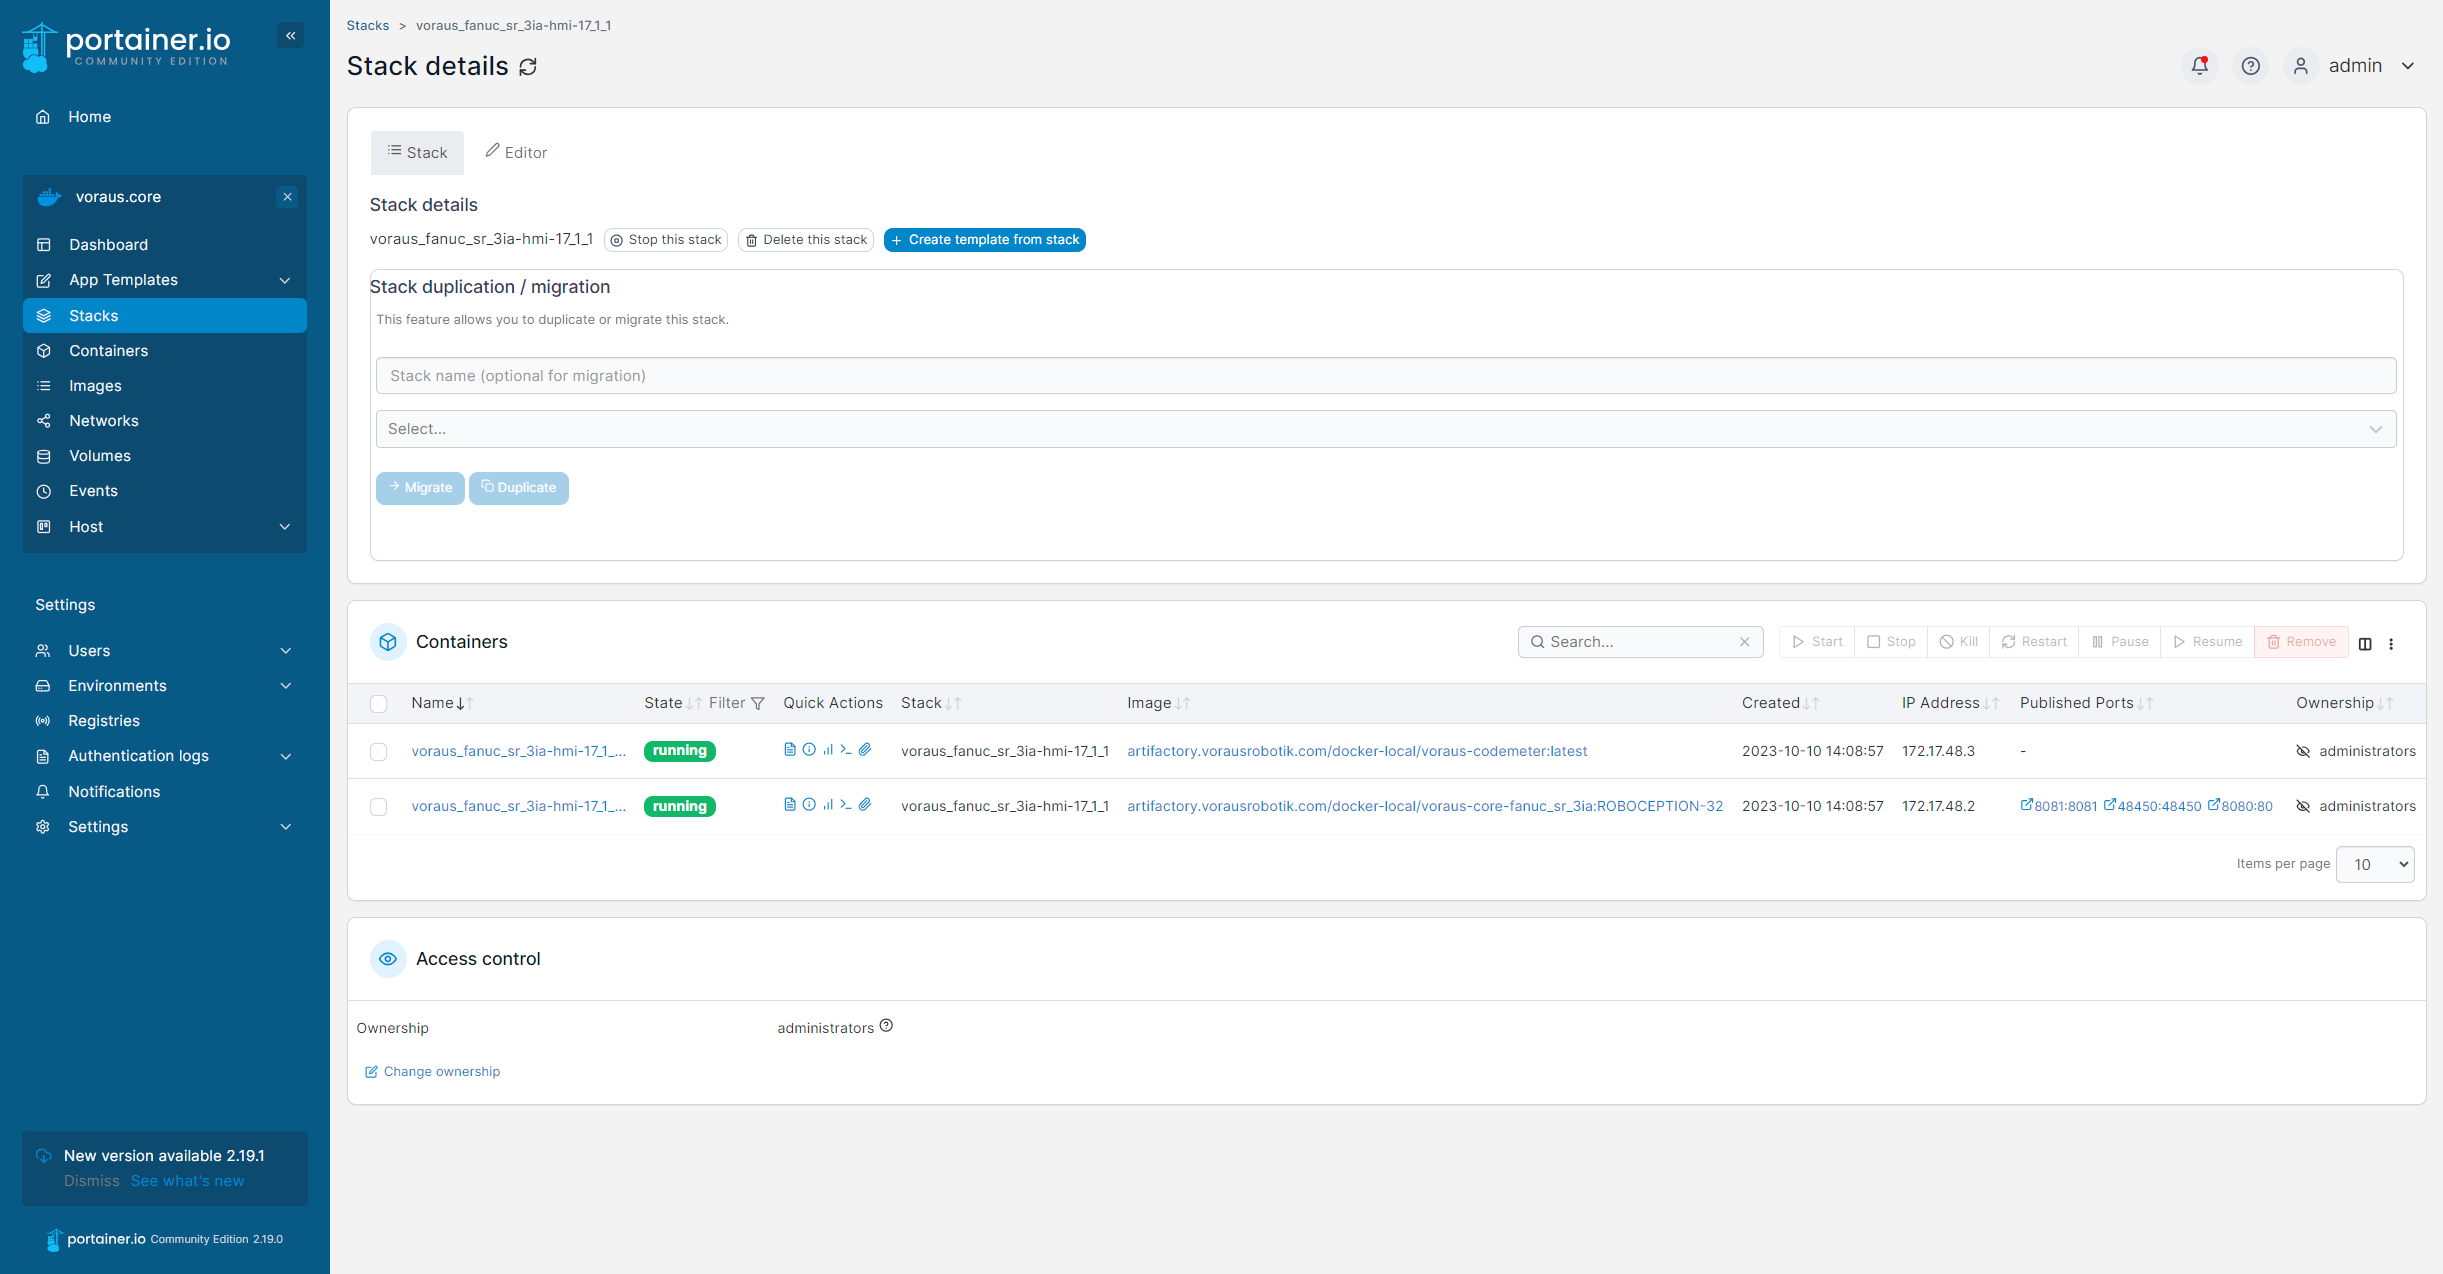
Fig. 8 Running stack
The voraus.core software stack has been created.
Essential properties like the robot type that is to be controlled by the software or additional plugins can be configured based on the steps described in the corresponding voraus.core documentation.
Note
Multiple stacks with the voraus.core software can exist in parallel, but only one can run at the same time. Stop all existing stacks before duplicating or creating a new stack.
Advanced docker knowledge might be required to set up a second stack in parallel.
3.2.4. Installation of additional packages
At times, additional Python packages are required to complement the existing software stack. This section outlines several methods to accomplish this. While the examples presented focus on the two most common approaches, users also have the option to leverage the comprehensive range of pip tools, such as employing a private PyPI server.
Warning
If you want to install Python packages from the file system, please make sure that the packages are compatible to the Python interpreter inside the Docker image. This is especially relevant for binary distributions.
Build a new Docker image from a base image in Portainer
Note
Prerequisites
The voraus.ipc running the voraus.core stack has access to the internet.
You received a base Docker image from voraus. In the following, it will be called “voraus-core:<core-image-tag>”. Replace <core-image-tag> with the version number of your voraus.core.
It is possible to modify the Docker image of the voraus.core directly within Portainer’s UI. Click on Images in the menu (Fig. 9/➊) and select Build a new image (Fig. 9/➋).
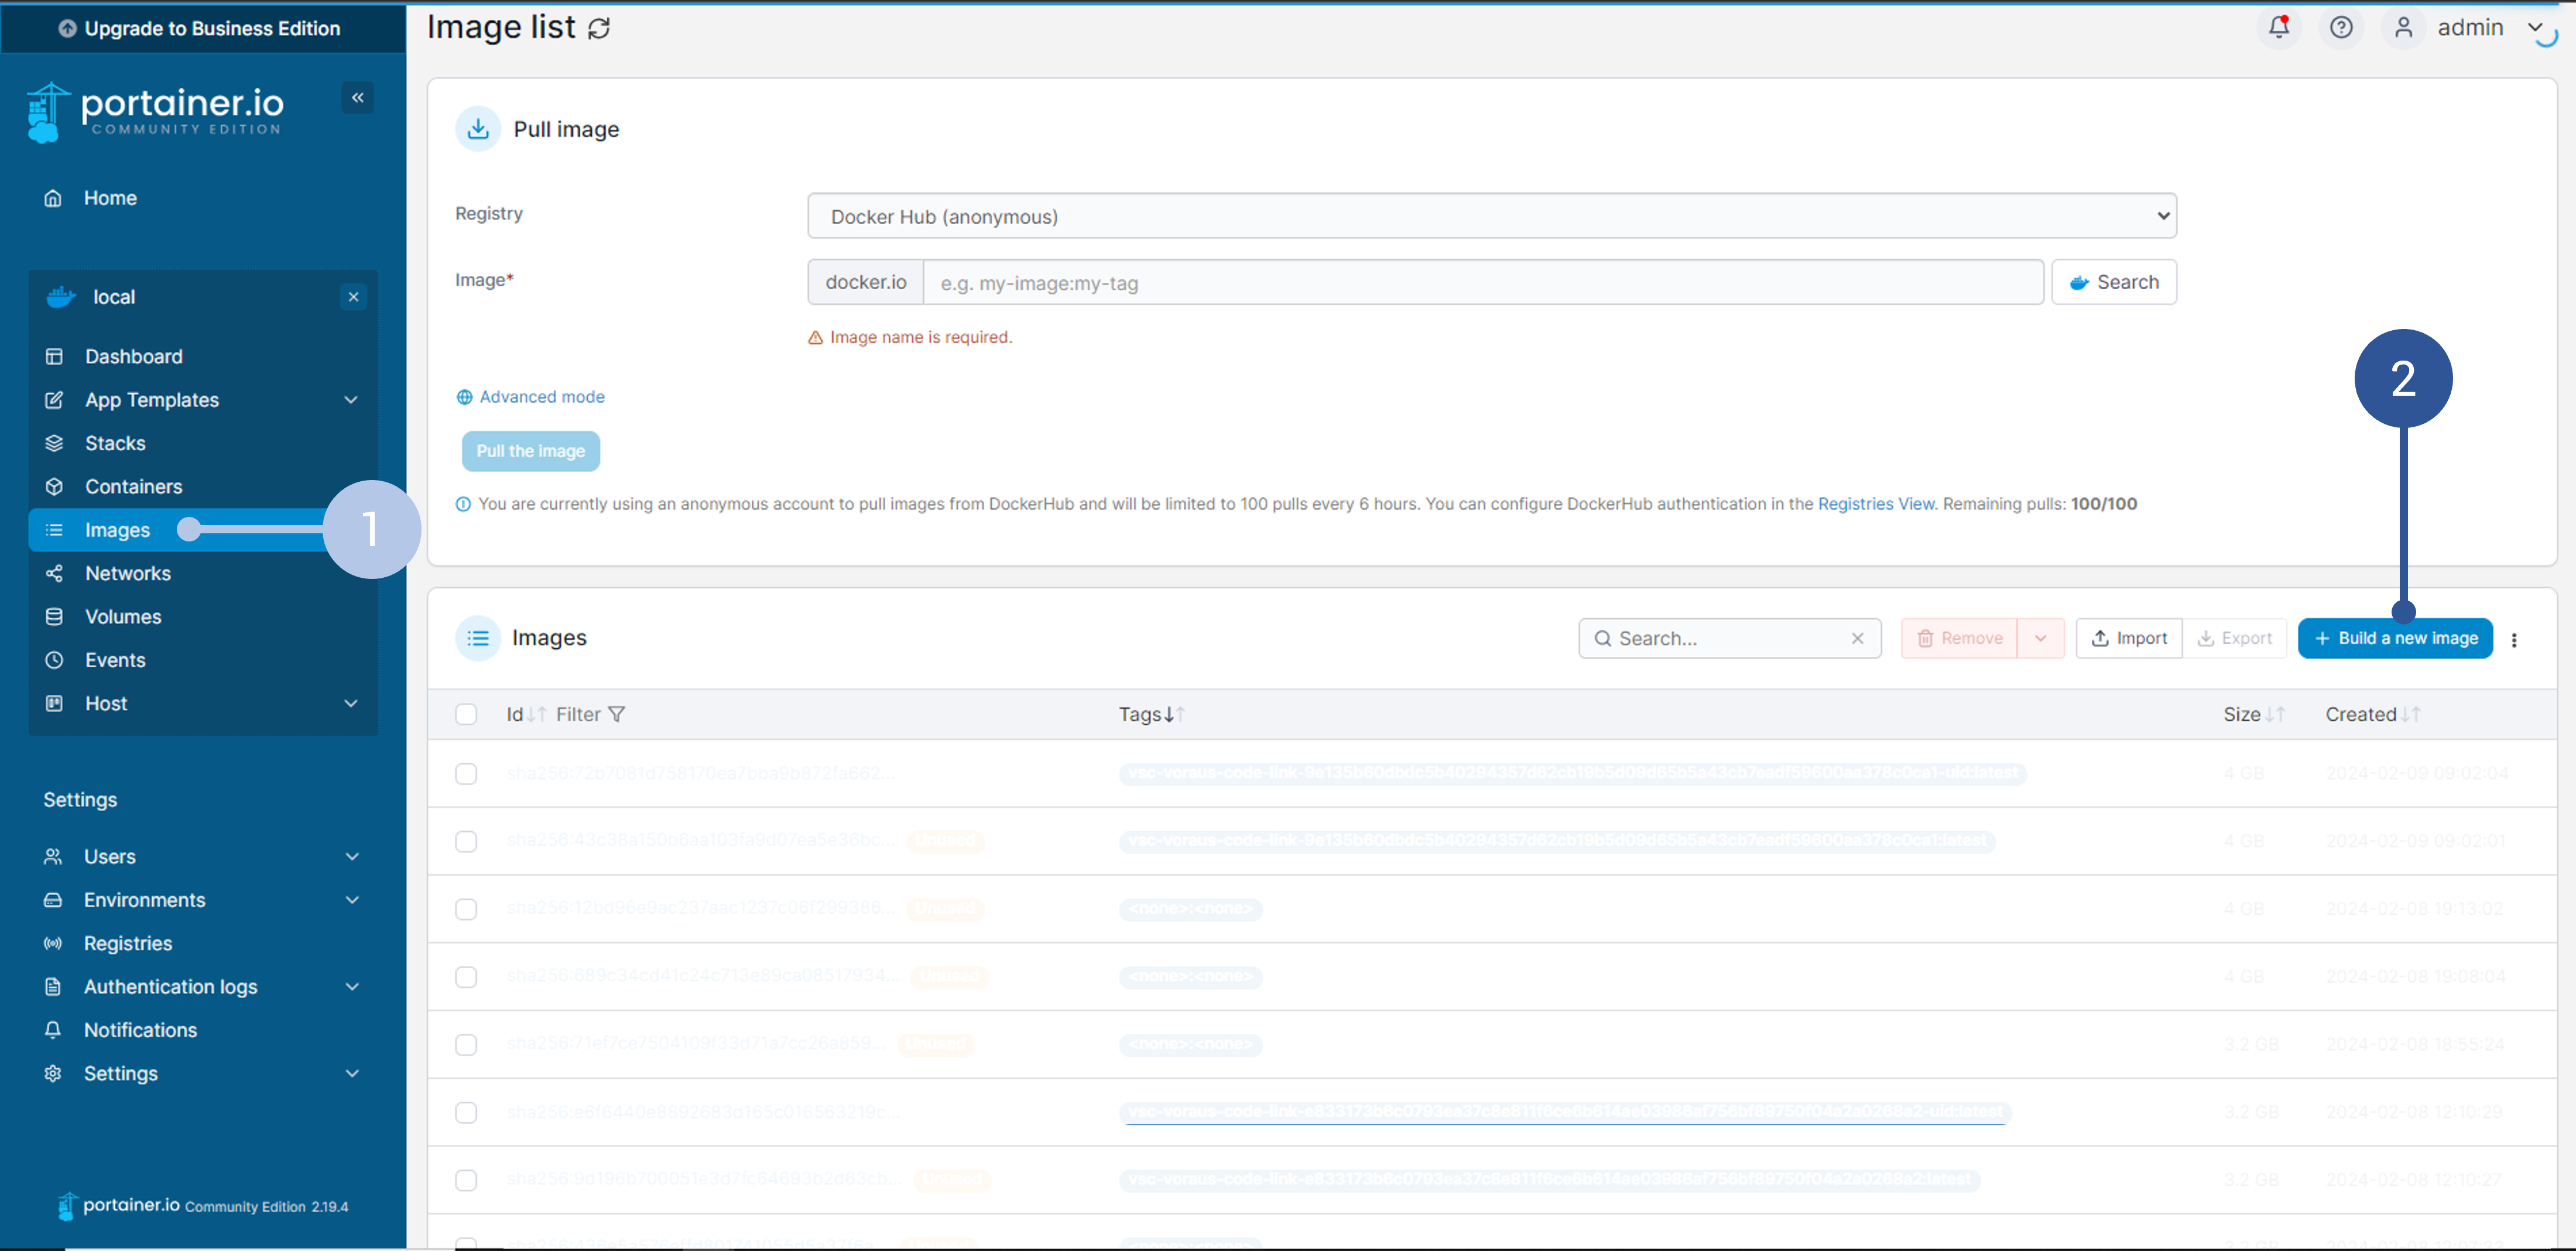
Fig. 9 Creation of a new Docker image
Give a name to the new image (Fig. 10/➊). In the example, the name mynewimage:1.0.0 was chosen.
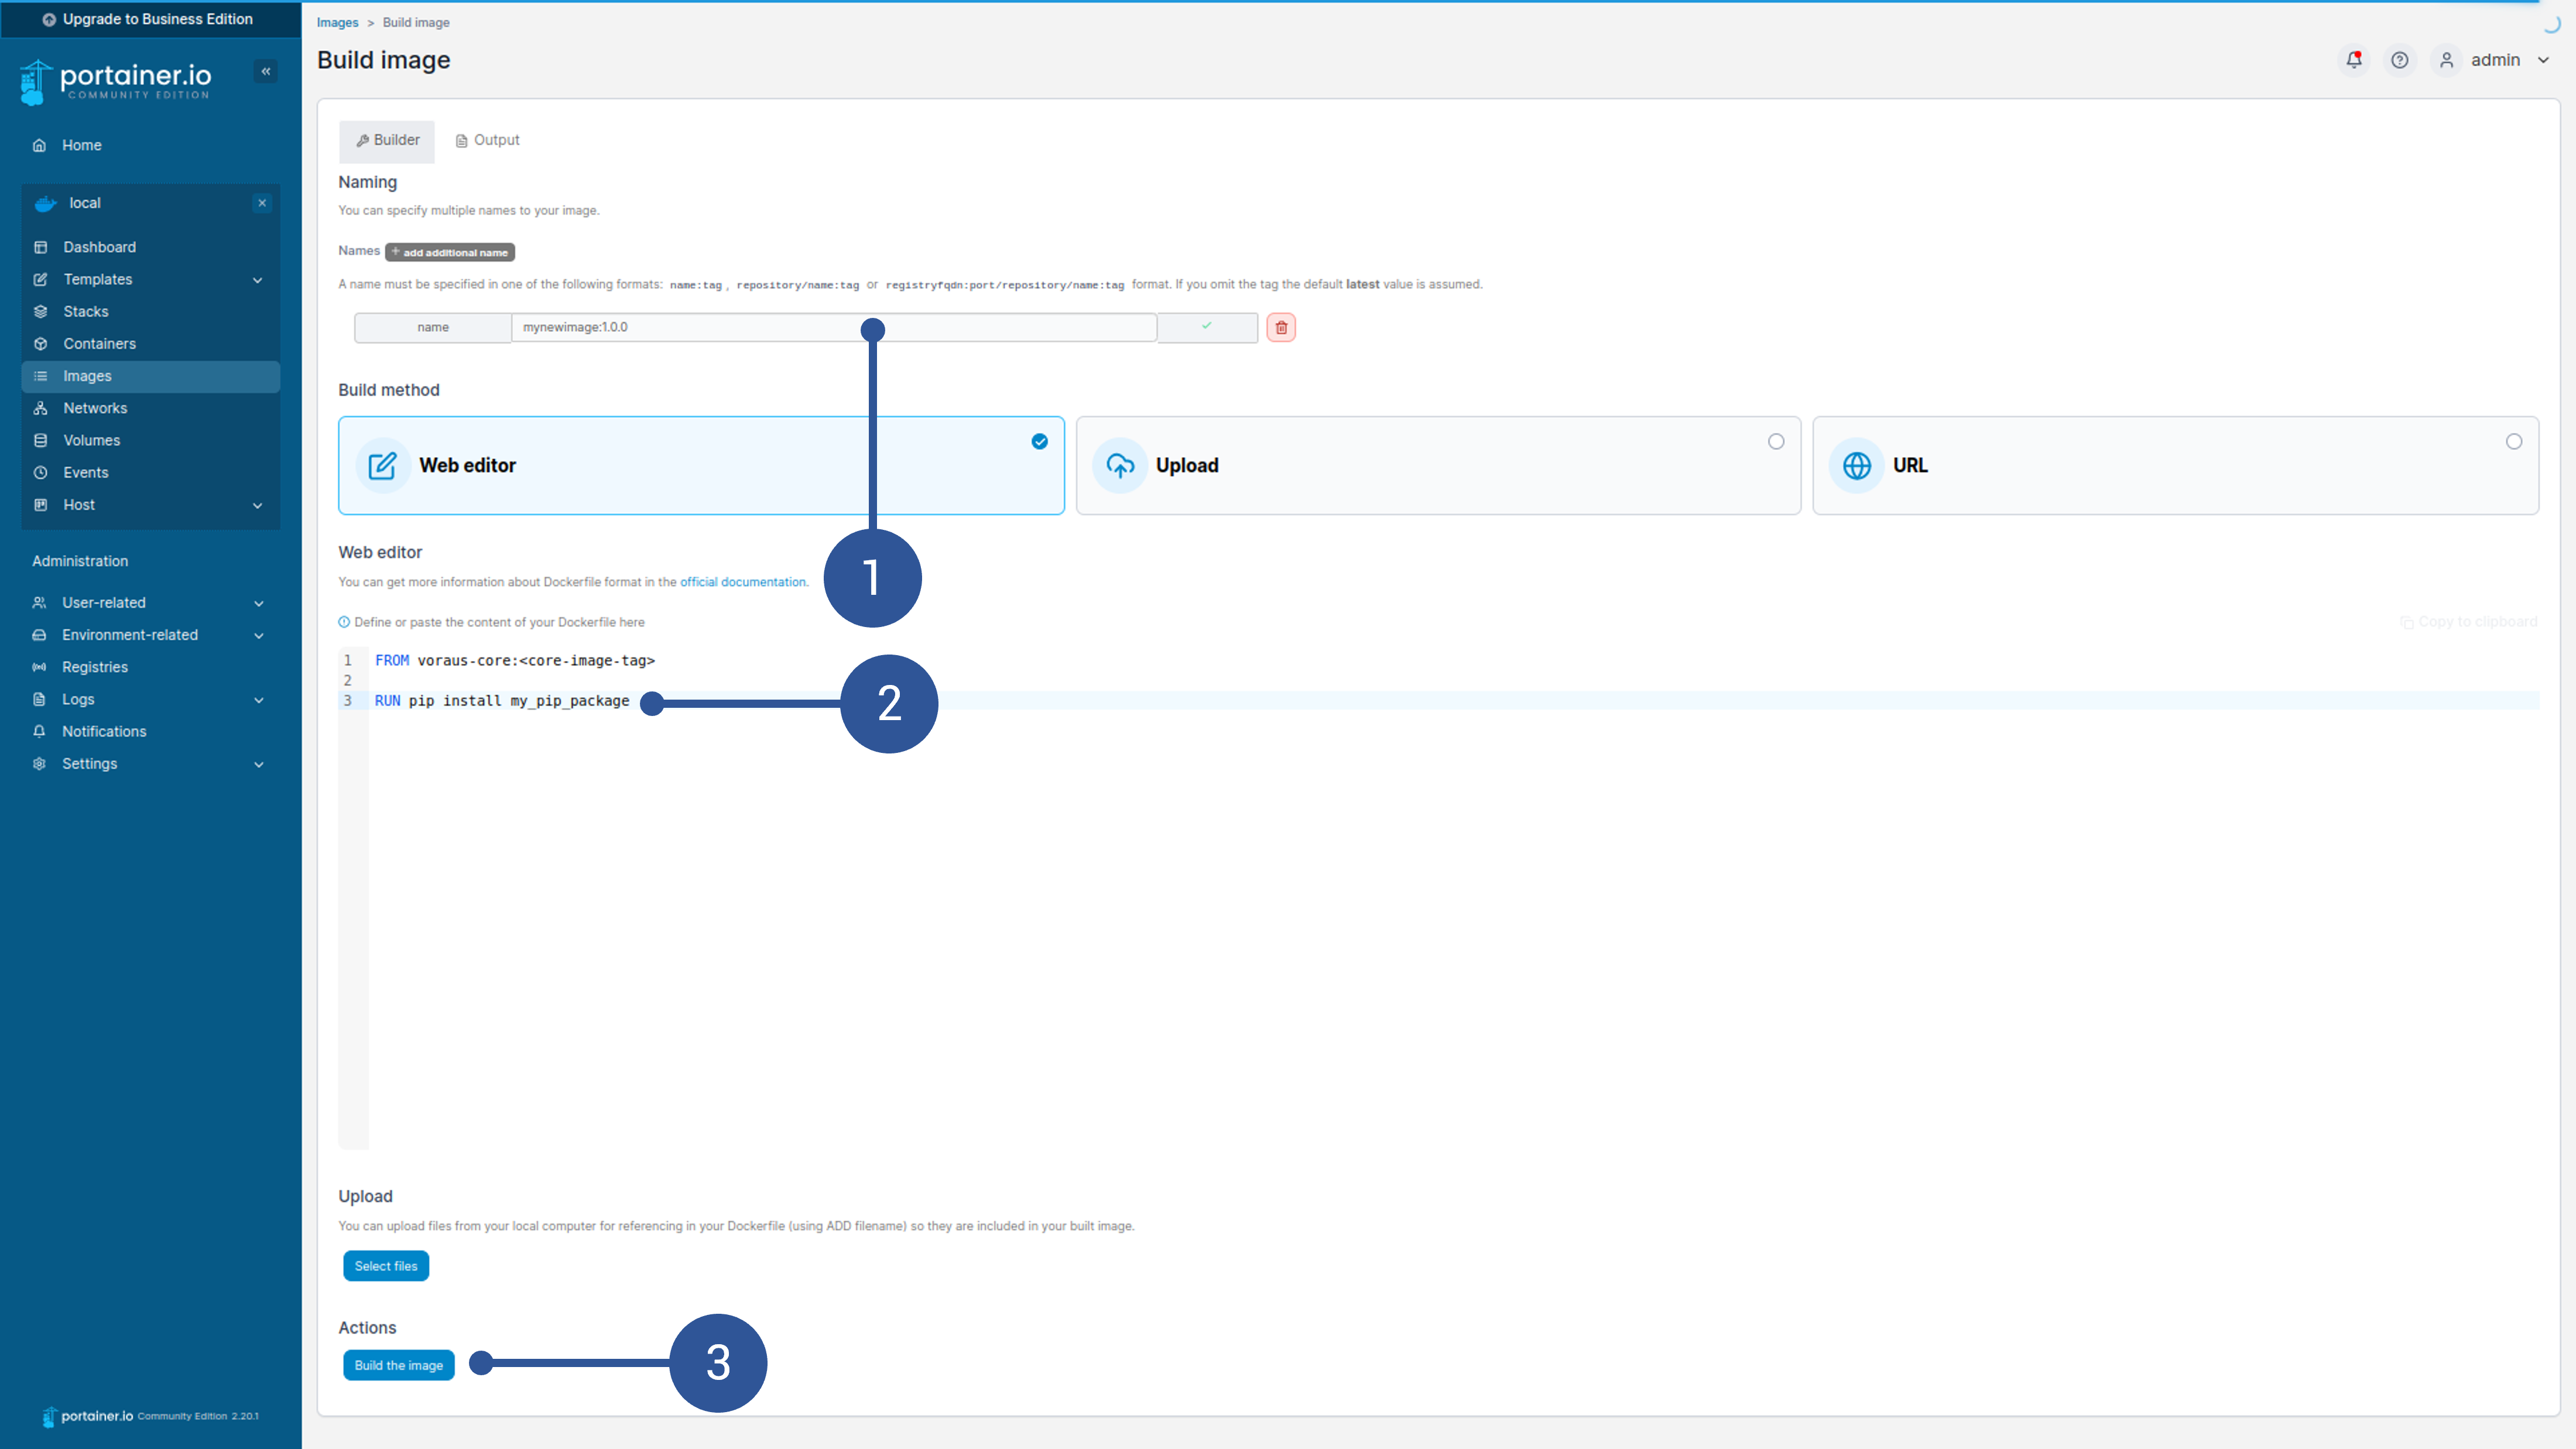
Fig. 10 Editing the new Docker image
Add the following code to the Docker file (Fig. 10/➋) :
FROM voraus-core:<core-image-tag> #Replace <core-image-tag> with the version number of your voraus.core.

RUN pip install my_pip_package
The version of the voraus.core must match an image version available on the voraus.ipc (see the Images tab). Afterwards, click on Build the image (Fig. 10/➌).
The new image can then be used in the software stack. Open the Docker compose editor (Stacks -> <your_stack_name> -> Editor) (Fig. 11/➊).

Fig. 11 Stack details window
Replace the image of the voraus.core with the new build image (Fig. 12/➊):
# image: voraus-core:<core-image-tag> # old image
image: mynewimage:1.0.0
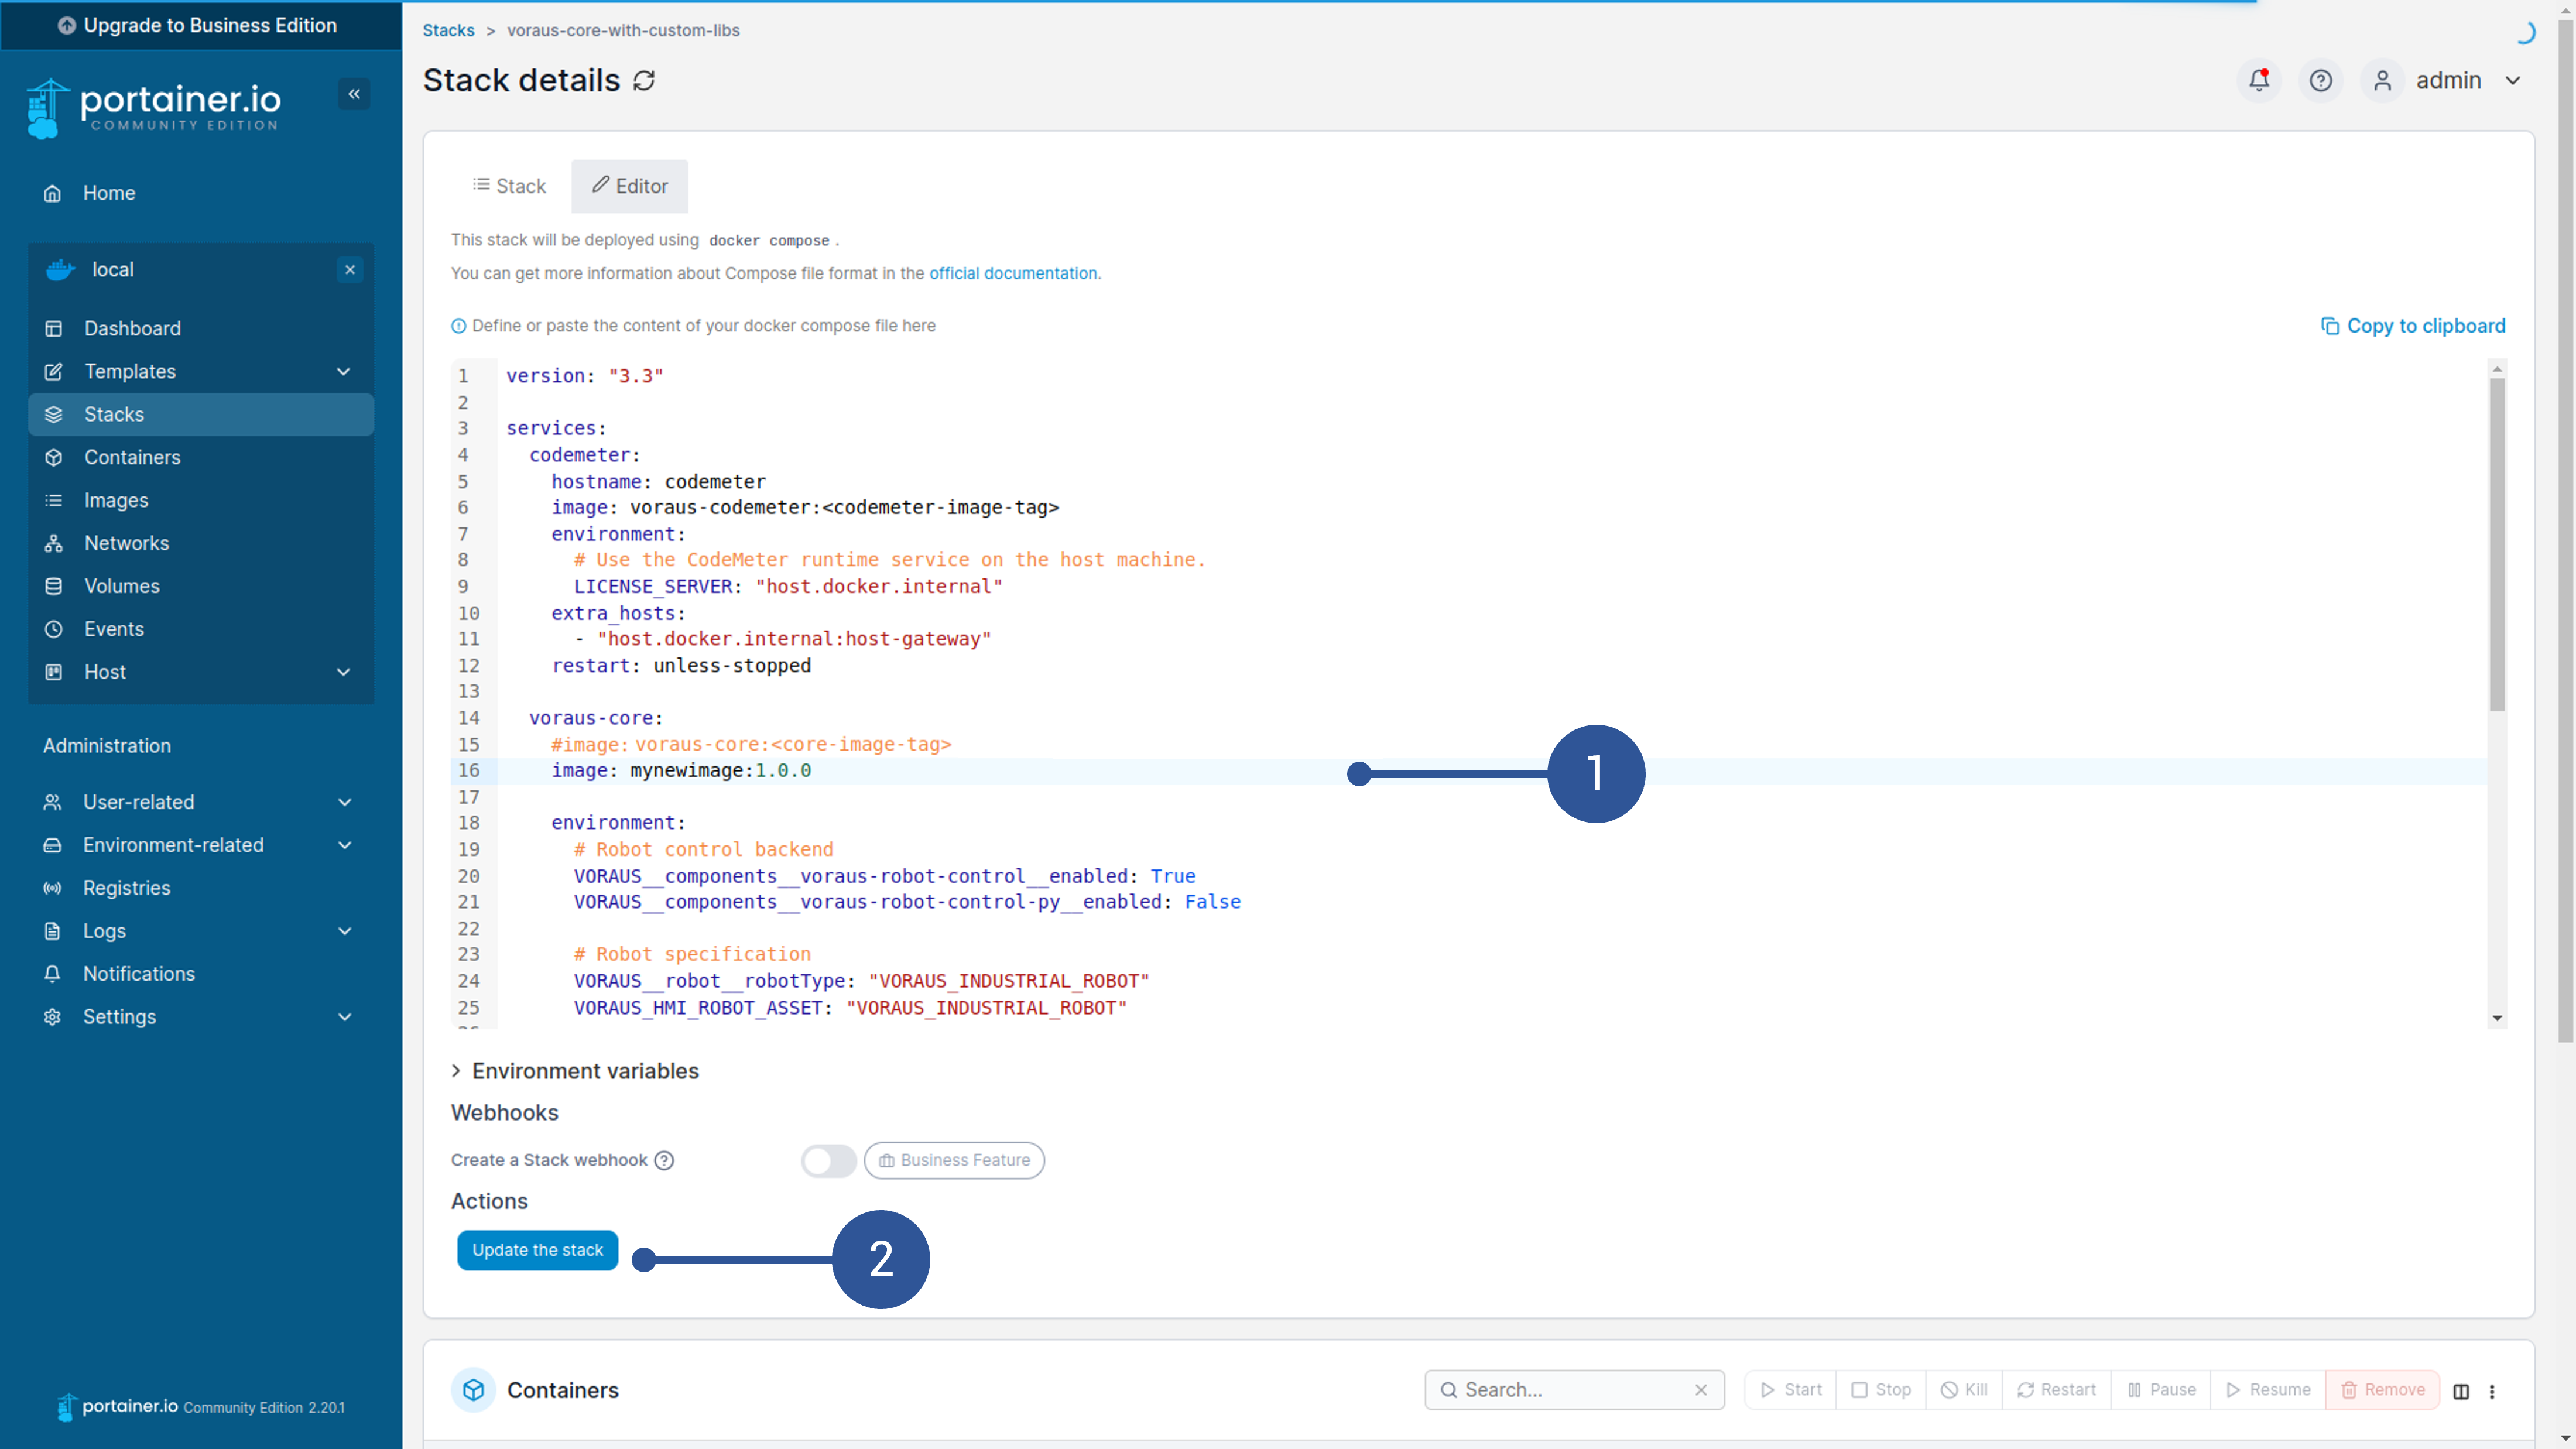
Fig. 12 Editing the stack
Finally, click on Update the stack (Fig. 12/➋). The additional libs are now applied and ready for usage.
Build a new Docker image from a base image manually
This section shows how to manually build a new Docker image containing additional Python packages (.whl files) located in a separate directory.
Note
In this tutorial it is assumed that the process is done on a voraus.ipc. However, all steps can also be done with any system running Docker. In that case you might need to update the paths used in this tutorial.
After following these steps, the resulting Docker image can be imported in Portainer like explained in Software Update.
For this method the voraus.ipc does not need access to the internet. Instead, all packages can be downloaded to your machine and copied to the voraus.ipc via an ssh connection.
Note
Prerequisites
You received a base Docker image from voraus. In the following, it will be called “voraus-core:<core-image-tag>”. Replace <core-image-tag> with the version number of your voraus.core.
Install the your voraus.core image via Portainer (see Software Update).
Download/gather all required additional Python packages as wheels (.whl) in a folder <yourFolderName/> locally.
Copy the folder containing the wheels to dockerWorkspace/ on the voraus.ipc:
scp -r <yourFolderName/> localuser@192.168.1.1:/home/localuser/dockerWorkspace/
Connect to your voraus.ipc:
ssh localuser@192.168.1.1
Create a Dockerfile.dev in /home/localuser/ and edit it:
touch Dockerfile.dev
nano Dockerfile.dev
Paste the following content to the Dockerfile.dev:
FROM voraus-core:<core-image-tag> # Replace <core-image-tag> with the version number of your voraus.core.
RUN --mount=type=bind,source=./dockerWorkspace/,target=/pip-packages/ \
      pip install --upgrade \
      /pip-packages/*.whl
Save the Dockerfile.dev by pressing CTRL+X and confirm with Y+Enter.
Build a new Docker image:
docker build -f Dockerfile.dev -t <insertYourImageName> .Note
The dot (.) at the end is important!
The newly built image is now accessible within Portainer. Use the new image name <insertYourImageName> in the stack compose file like explained in Editing the stack.