4.2. Development
To develop with the voraus.core //virtual, the Dev Container must be opened as described in Open Dev Container.
4.2.1. Write a Python Script
This section describes how easy it is to move a robot using the Python programming language. Therefore the voraus-robot-arm Python package can be used, which is available with the Dev Container example.
Create new Python file
Create a new Python file by clicking on New File…, as shown in Fig. 19. A new empty file now appears in VS Code, which is used in the next sections.
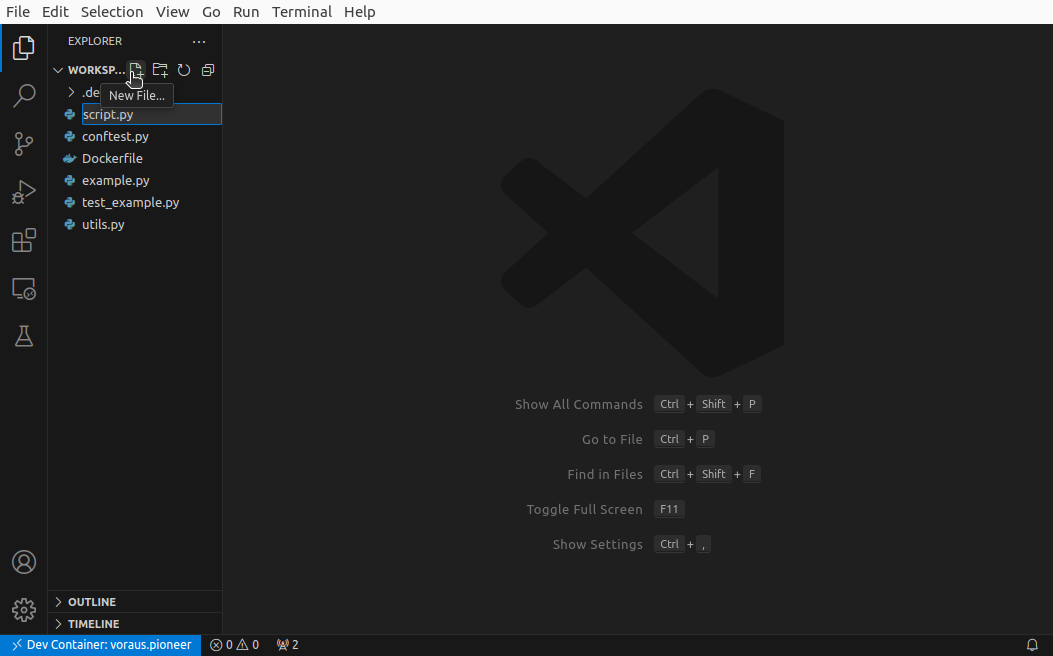
Fig. 19 Create a new Python File in VS Code
Write the Python Code
The voraus-robot-arm Python package provides various classes for the development of robot applications. In this example, the RobotArm class is used to control the robot, as well as the JointPose class, which represents a pose in joint angle space. The x and y functions can be used to perform relative Cartesian movements.
1from voraus_robot_arm import RobotArm, JointPose, x, y
2
3robot = RobotArm()
4home = JointPose(0, -1.57, 1.57, -1.57, -1.57, 0)
5
6with robot.connection("opc.tcp://voraus-core:48401/"):
7    robot.move_ptp(home)
8    robot.move_linear(x(0.2), relative=True)
9    robot.move_linear(y(0.3), relative=True)
The RobotArm object is initialized in line three. The home pose of the robot is then defined as a variable with a joint pose consisting of joint angles in radians. In line six, the connection to the voraus.core //virtual is established, which is automatically disconnected as soon as all indented commands have been completed.
The first robot movement is a point-to-point command that moves the robot to the home pose. The two movement commands in lines eight and nine are linear movements that result in a linear end effector path. Both commands are executed relative to the current end effector position, the first on the x-axis and the second on the y-axis.
Run the Python File
The Python script is started via the Run Python File button in the top right-hand corner (see Fig. 20). A terminal opens and displays the console output of the script.
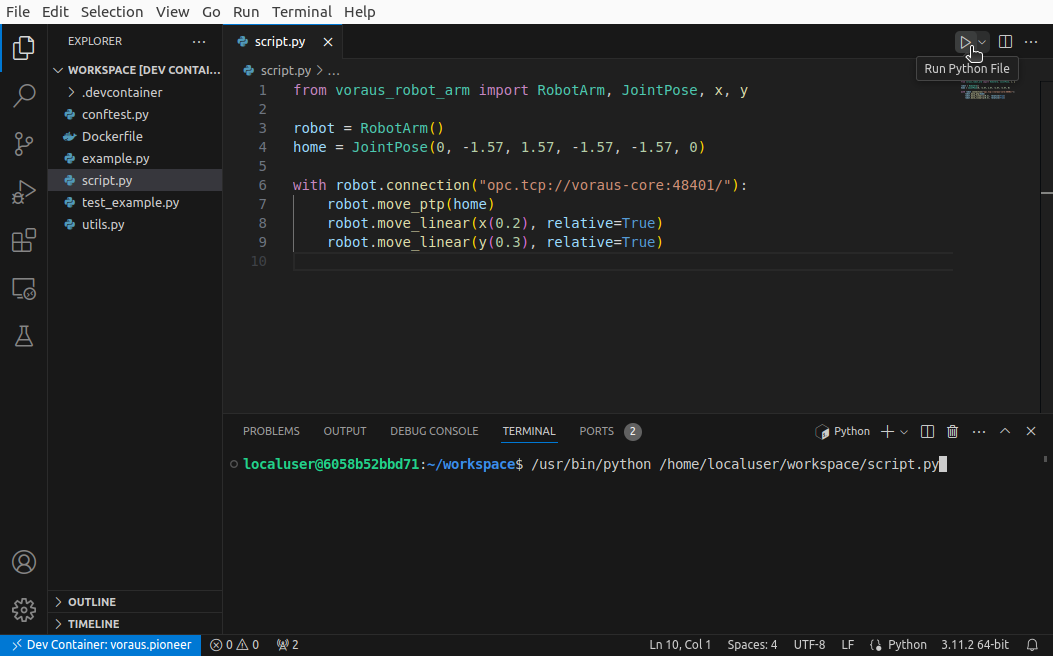
Fig. 20 Run the Python File in VS Code
Visualize the Robot Movement
The resulting robot movement can be viewed in the 3D visualization of the voraus.operator via localhost:8080 in the web browser. In addition to the point-to-point movement to the home pose, the two linear movements are also recognizable in light green (see Fig. 21).
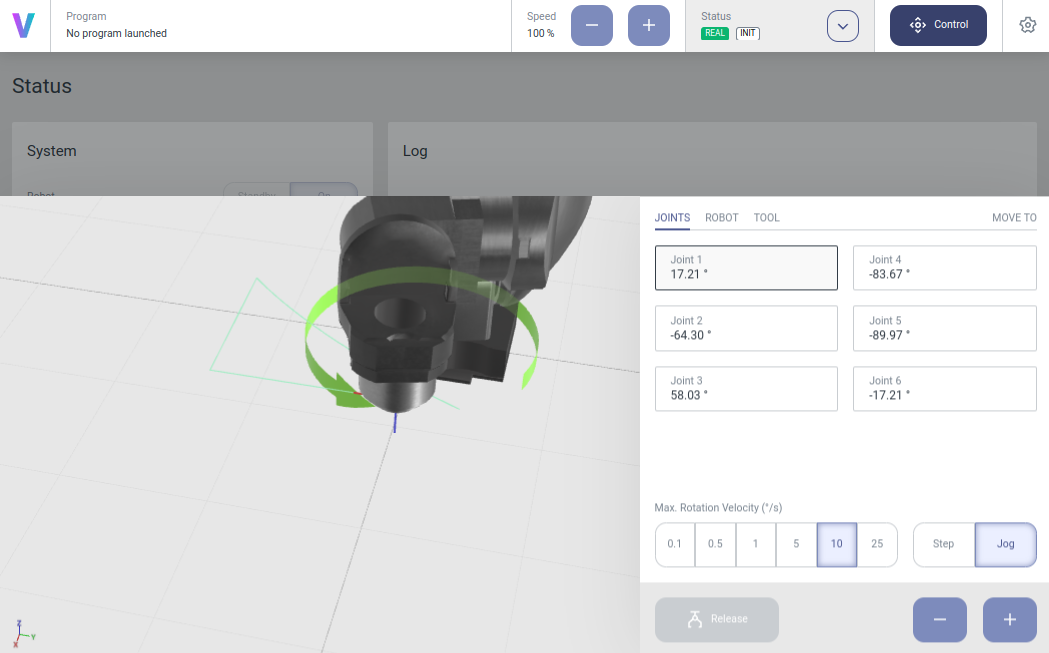
Fig. 21 Verify robot movement with the 3D visualization
4.2.2. Use a Debugger
This section explains how to run your python application with the Python Debugger. For example, you can run applications step by step, pause at a breakpoint, view the values of variables live and execute commands at any point in the program.
If you are interested in further information, please read the articles Quick Start Guide for Python in VS Code - Debug and Python debugging in VS Code.
Add a Breakpoint
A breakpoint leads to a pause when executing the program with the debugger, in which the state of all variables remains. This allows you to check your program at any point.
You can add a breakpoint by clicking with the mouse to the left of the line number. A red circle then indicates the breakpoint in this line, as shown in Fig. 22. You can remove the breakpoint by clicking on the red circle again.
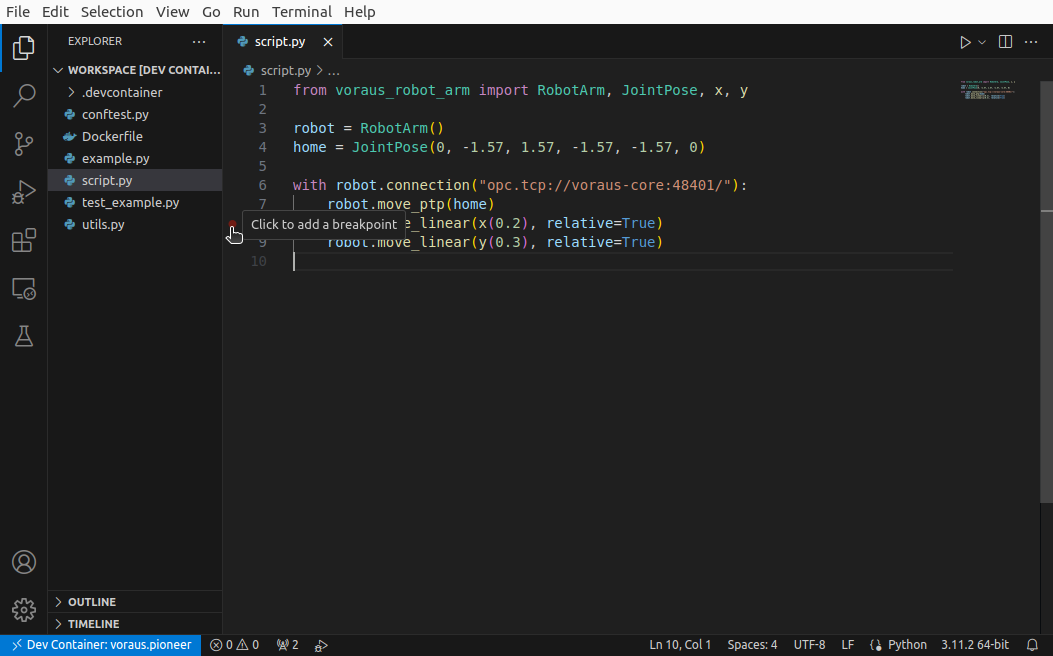
Fig. 22 Add a breakpoint in VS Code
Start the Python Debugger
Press ctrl + shift + p to open the search function of VS Code.
Search for Python Debugger: Debug Python File and click on it (see Fig. 23).
The Python Debugger should now start and execute the script up to the breakpoint.
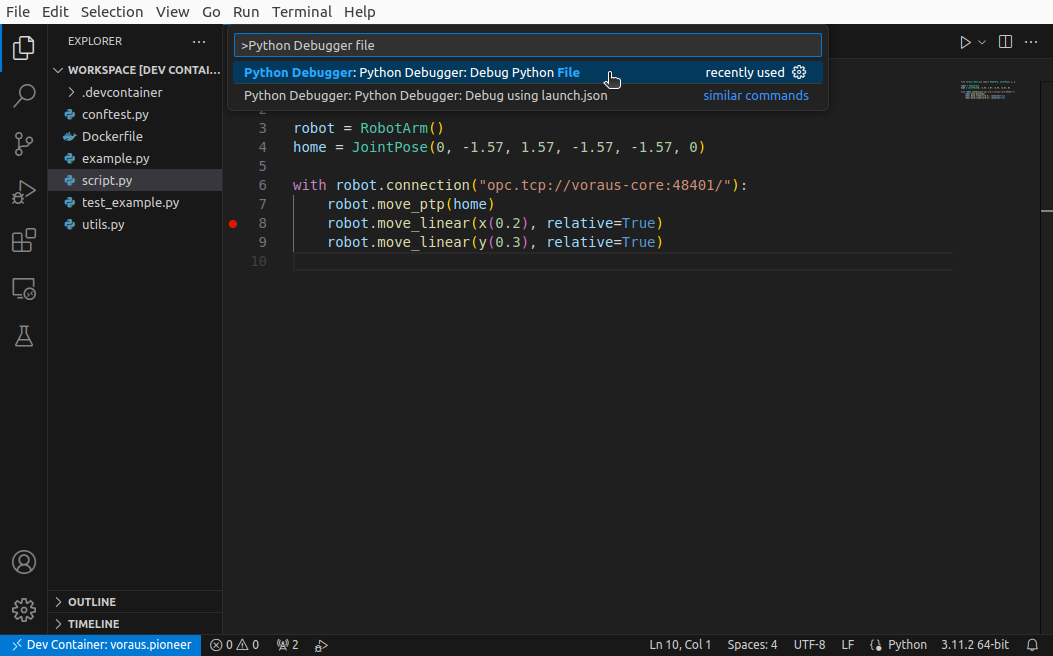
Fig. 23 Start the Python Debugger in VS Code
Use the Python Debugger
The Python Debugger has executed the program up to the breakpoint in line eight (see Fig. 24).
The command in line eight has not yet been executed itself.
By pressing the F5 key, the program is executed until the next breakpoint or until the end if none follows.
The program can be executed step by step by pressing the F10 key.
Press the F10 key and observe how the robot executes the next movement command and then stops again.
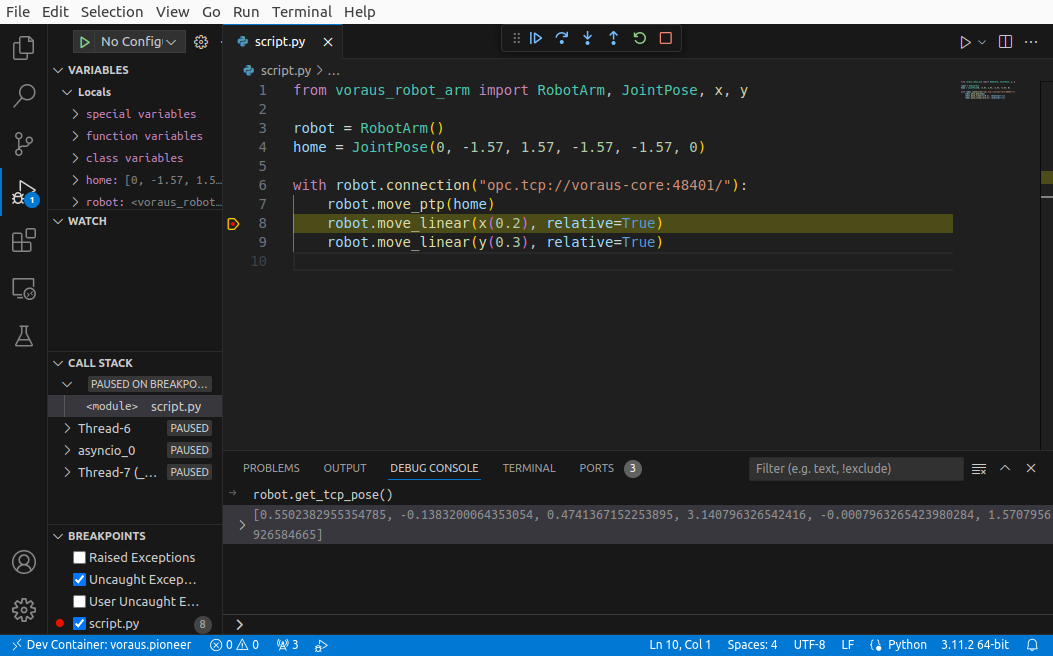
Fig. 24 Active Python Debugger in VS Code
The state of the program with all currently set variables is displayed at the top left.
This is very helpful when debugging complex systems.
At the bottom, you can click on DEBUG CONSOLE to interact with the program in the current scope,
where all variables such as robot are available. For example, you can print the current
Cartesian position using the robot.get_tcp_pose() command.